

What Is the Shopify AI Toolkit?
On April 9, 2026, Shopify quietly released something that most merchants haven't fully registered yet. No launch event. No splashy press conference. Just a developer changelog entry, a documentation page, and a few posts on X from Shopify president Harley Finkelstein. The product is the Shopify AI Toolkit — a free, open-source plugin that connects AI coding agents directly to your Shopify store.
Here's the simplest way to understand it: before this toolkit, AI tools like Claude Code and Cursor could help write Shopify code, but they were operating blind. They worked from training data that was often months out of date. They couldn't verify whether the API they were using was current. And they couldn't actually execute anything on your store. The Shopify AI Toolkit closes all three of those gaps at once.
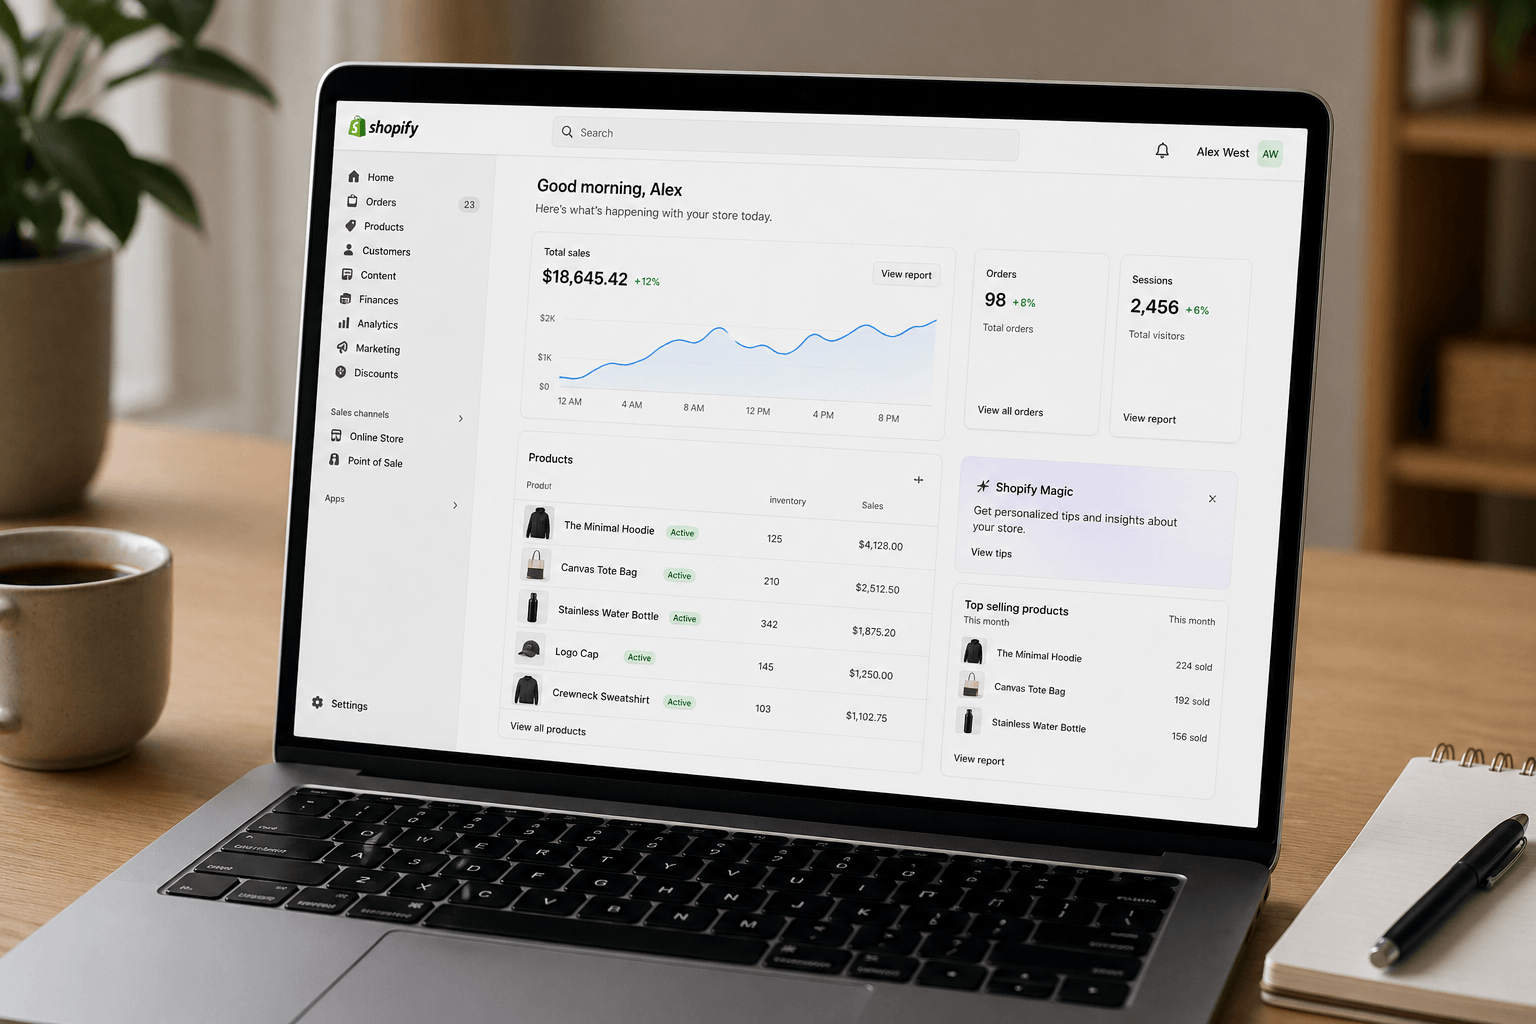
Once installed, your AI agent gets live access to Shopify's full developer documentation, real-time GraphQL API schema validation, and the ability to execute actual store operations through the Shopify CLI. Products. Inventory. Metafields. Theme files. Orders. Collections. All of it — through plain English prompts. It supports Claude Code, Cursor, VS Code, Gemini CLI, and OpenAI Codex. Installation takes about five minutes. And it's completely free — no per-call API fees from Shopify, no upgrade gates.
The toolkit includes 16 skill files covering different parts of the Shopify platform and exposes seven core tools AI agents can call during any workflow: documentation search, schema introspection, code validation for GraphQL queries, Liquid templates, and UI extensions, plus direct store execution through the CLI. The result is that one merchant with an AI agent can now realistically handle operational work that used to require a developer or a small team.
Let's get into exactly what that looks like, starting with what merchants have already documented doing with it since launch.
7 Real-World Use Cases Merchants Are Already Running
The toolkit is less than a month old, but the community has moved fast. Here are seven documented implementations — with sources — that show what's already happening in the wild.
1. Bulk SEO and Metafield Updates Across Hundreds of Products
This is the use case showing up most consistently across community discussions and early adopter write-ups. EasySell's detailed breakdown of the toolkit highlights this as one of the highest-leverage applications: prompting the agent with "List all products missing a meta description or alt text" produces an instant SEO gap report across an entire catalog. From there, a follow-up prompt generates and pushes the missing content in one pass.
For metafields, the same pattern applies. If you use custom fields for sizing charts, care instructions, material specs, or certifications, you can update hundreds of metafields in one command instead of the click-heavy manual process of editing each product record individually through the admin. The Shopify Community thread on the toolkit lists bulk metafield and SEO updates as one of the top three most-cited practical uses by merchants who have already set it up.
What makes this genuinely different from a third-party SEO app is specificity. The agent is querying your actual store data, applying your actual brand voice instructions, and writing copy that reflects your actual product catalog — not generic AI filler.
2. Custom Reporting That Shopify's Native Analytics Won't Give You
Community documentation consistently flags this as one of the highest-demand use cases: pulling custom reports the Shopify admin won't give you natively. Shopify's built-in analytics handle the basics well, but merchants regularly hit walls when they need cross-referenced data — which customers bought Product A but never Product B, which discount codes drove the highest new customer acquisition rate, which products have the highest 90-day return rate by variant.
None of those reports exist out of the box. With the toolkit, you describe what you want and the agent constructs the GraphQL query, runs it against your store's live data, and returns results formatted however you ask. No third-party analytics app required. No developer needed to write the query.
3. Building a Complete Shopify App From Scratch
Developer TinyTwo documented building a full Shopify review app called ReviewMate entirely through Claude Code with the toolkit installed, in a 3-part Medium series. Ask Phill's deep-dive on the toolkit covers this case in detail: the AI agent handled not just the core functionality but security patterns — HMAC verification, XSS protection — without being explicitly told to include them. The app is now serving real merchants in production.
The toolkit's schema validation is what makes this different from just prompting ChatGPT. Because the agent pulls live Shopify documentation and validates against the actual current API schema, it generates Shopify-compliant code on the first pass far more often than when someone pastes a generic prompt into a standard AI chat window.
4. Accelerating Developer Onboarding to Day-Two Shipping
Ask Phill's report documents developer Karan Goyal's experience after integrating the Dev MCP Server with Cursor and Claude: a junior developer on his team was shipping production features by day two. Not reading documentation on day two. Shipping. Goyal described it as the biggest shift in Shopify development he had seen in years, attributing it specifically to the elimination of constant context-switching between the Partner Dashboard, API docs, and code editor. For merchants who work with developers or agencies, this means faster turnaround times and lower hourly bills.
5. Natural Language Store Operations via CLI
Nadcab's launch coverage walks through a concrete before-and-after: before the toolkit, updating winter jacket products to reflect a 20% discount meant a developer manually writing and checking GraphQL, finding errors, fixing them, and executing changes through the admin. After the toolkit, the same merchant types the instruction in plain English, the agent pulls the live schema, generates a validated mutation, and executes it directly. Under a minute. No dashboard. No manual checking. No tool-switching.
Shopifreaks' coverage lists the full scope of what natural language store operations can touch: bulk product updates, SEO and metafield edits across hundreds of listings, collection editing, inventory checks, custom reporting, product tagging at scale, and theme modifications.
6. Product Tagging and Organization at Scale
The Shopify Community thread calls out product tagging and organization at scale as one of the most immediately practical use cases for merchants with large catalogs. The workflow is straightforward: describe your tagging taxonomy to the agent, pull a list of untagged or inconsistently tagged products from the store, and have the agent apply the correct tags based on product title, description, and type. Catalogs that would take days to manually audit and re-tag can be normalized in a single session.
This has downstream value beyond just tidiness. Consistent tagging feeds smart collections, powers personalization logic, improves search results within the store, and makes future bulk operations far more reliable because the agent can filter by tag with precision.
7. SKU Onboarding Time Reduced From 12 Minutes to 90 Seconds
This one comes from the broader AI-assisted metafield ecosystem that the toolkit slots into. AgentiveAIQ's documented case study of a sustainable fashion brand shows SKU onboarding time dropping from 12 minutes to under 90 seconds per product by automating metafield population through AI. When a merchant uploads a product spec sheet, the AI extracts data like "organic cotton" and maps it directly to the correct product metafield — eliminating manual entry entirely. At scale, that math changes the economics of expanding a catalog completely. Adding 500 new SKUs that used to represent 100 hours of admin work now takes under 13 hours. With the Shopify AI Toolkit providing direct API access, this kind of workflow runs without any third-party app dependency.

What You Could Build: 9 Conceptual Use Cases With Detailed Step-by-Step Instructions
The toolkit is new enough that the vast majority of its potential hasn't been publicly documented yet. Here are nine of the most compelling workflows merchants can build right now — with detailed instructions for implementing each one.
Use Case 1: The AI Store Auditor
Imagine running a comprehensive health check on your entire store the way you'd run a technical SEO audit on a website — except instead of a third-party tool giving you generic recommendations, it's your AI agent querying your actual live data and surfacing gaps that are specific to your store.
- Step 1: Install and authenticate. Install the toolkit on Claude Code using the two-command plugin setup (/plugin marketplace add Shopify/shopify-ai-toolkit followed by /plugin install shopify-plugin@shopify-ai-toolkit). Then authenticate with your production store via Shopify CLI (shopify auth login). Always do your first run on a development store to get comfortable before pointing it at production.
- Step 2: Build your audit template. Create a plain text file called store-audit.txt. Write out every audit criterion you want checked: products missing meta descriptions, products missing alt text on primary images, products with no collection assignment, products with no tags, discount codes that are expired but still active, collections with zero products, inventory items below your defined restock threshold, theme sections with no content populated, and any metafield definitions that have no values populated across your catalog.
- Step 3: Run the audit session. Open a Claude Code session, paste your audit template, and instruct the agent to run each check as a separate GraphQL query against your store. Ask it to compile results into a single structured report, organized by severity.
- Step 4: Prioritize by business impact. Follow up with: "Sort these issues by which ones are most likely to hurt conversion rate or SEO ranking first, then list operational issues second." The agent will re-rank the findings so you know where to start.
- Step 5: Execute fixes in the same session. For each category of issue, ask the agent to fix it: generate the missing meta descriptions, fill the empty alt text, deactivate the expired discount codes. Each fix is confirmed before execution.
- Step 6: Schedule it as a recurring habit. Save your audit template. Run it monthly. Each session takes under 15 minutes once the template is dialed in, and the compounding effect on your catalog quality is significant over time.
The power here is specificity. A generic analytics tool gives you generic insights. Your AI store auditor knows your exact store structure and surfaces gaps that no pre-built dashboard would think to flag.
Use Case 2: The Seasonal Refresh Agent
Every merchant knows the pain of seasonal transitions. Updating product copy, rotating collections, adjusting sale messaging, refreshing homepage content — it's a multi-hour job that blocks the whole team every few months. With the toolkit, it becomes a single coordinated prompt session.
- Step 1: Write a seasonal brief document. Before your transition date, create a plain text file: summer-2026-brief.txt. Include the season's tone and energy, key products being featured, sale parameters and discount percentages, any messaging or vocabulary guidelines, and words or phrases you specifically want to avoid. Think of this as the creative brief you'd give a copywriter.
- Step 2: Start with a catalog inventory. Open your AI session and instruct the agent to pull a list of all collections and products that are currently active on the store. This gives you a baseline before any changes are made, and it helps the agent understand the scope of work.
- Step 3: Feed it your seasonal brief. Share the brief file with the agent and instruct it: "Using this brief, rewrite product descriptions for the following collections to reflect summer use cases and the sale pricing. Apply the tone guidelines consistently across all copy." Work through collections in batches of 30 to 50 products to keep each session manageable and reviewable.
- Step 4: Update collection pages and homepage sections. Once product descriptions are done, have the agent separately update your collection page descriptions and any homepage content sections that reference seasonal messaging. These are often overlooked but matter significantly for both SEO and conversion.
- Step 5: Clean up the previous season. Instruct the agent to audit for leftover seasonal artifacts: expired discount codes that are still active, out-of-season collection page copy that references the previous period, or homepage banners that haven't been updated. This is the kind of cleanup that almost always gets missed when teams do seasonal transitions manually.
- Step 6: Run a consistency check. Before closing the session, ask the agent to review 20 random product pages from the updated set and flag any where the tone deviates from the brief or where changes feel inconsistent. Fix those in the same session.
Use Case 3: The Smart Collection Builder
Shopify's native collection rules are useful but limited. They handle tag equals X and price less than Y, but they don't account for the nuanced merchandising logic that experienced buyers think in. Building smart collections for every traffic campaign or audience segment manually is tedious at scale. Here's a better approach.
- Step 1: Define the audience and intent in plain English. Before opening your AI session, write a one-paragraph description of the customer and the shopping context: who they are, what they're looking for, what price range makes sense, and what makes a product a good fit for this collection. The more specific you are here, the better the agent's output will be.
- Step 2: Have the agent query your catalog. Share your audience description with the agent and instruct it to pull all products from your store that match the profile based on tags, price range, product type, and metafield values. Ask it to return the list with a brief explanation of why each product was included or excluded.
- Step 3: Review and refine. Go through the proposed product list. Push back on any inclusions or exclusions that feel wrong: "Why did you include Product X? It doesn't have strong enough imagery for a gift collection." The agent will adjust its criteria based on your feedback and re-run the query.
- Step 4: Create the collection and assign products. Once the list looks right, instruct the agent to create the collection in your store with a name, description, and SEO metadata that reflect the audience intent — then assign the product list to it. All without opening the admin.
- Step 5: Set up ongoing maintenance. Prompt the agent weekly or biweekly to check whether any new products added to your catalog should be assigned to existing smart collections, keeping them current as your inventory grows.
This workflow is particularly powerful for merchants running paid traffic campaigns who want highly targeted landing pages without manually curating hundreds of collection pages. If you're also using shoppable video on those collection pages, Moast's guide to shoppable video examples is worth exploring for inspiration on how top brands structure video content alongside curated product collections.
Use Case 4: The Custom Report Generator
This one unlocks a fundamentally different level of business intelligence — without expensive analytics tools or a dedicated data team. The key is knowing which questions to ask.
- Step 1: Define your unanswered questions. Before the session, write down the three to five questions about your store you genuinely cannot answer with current Shopify reports. Examples: Which customers have placed more than three orders but haven't purchased in over 90 days? Which products are most commonly bought together in the same order? Which referral source drives the highest average order value, not just the most orders? Which variants have the highest cart abandonment rate?
- Step 2: Run queries one at a time. Share your first question with the agent and ask it to construct the GraphQL query that retrieves the relevant data from your store. Let the agent explain the query logic before executing so you understand what it's pulling and why.
- Step 3: Format output for your needs. Instruct the agent to format results as a table, and to write a brief interpretive summary: "Here is the data. Now tell me in two sentences what the most important pattern is and what action it suggests."
- Step 4: Build a query library. As you develop reports you trust and find useful, save the prompts and queries in a plain text file. Over time, you build a custom reporting system tailored to your business questions — not the generic metrics someone else decided you should care about.
- Step 5: Feed insights into other workflows. The customers identified as lapsed high-value buyers become a segment for a re-engagement campaign. The product pairs that surface from order data become the basis for a new cross-sell collection or a post-purchase upsell flow. Each report pays for itself in downstream action.
Use Case 5: The Supplier Data Ingestion Agent
Most merchants receive product data from suppliers as spreadsheets, PDFs, or poorly formatted emails. Translating that into structured Shopify product records — with variants, metafields, SEO copy, and proper tagging — is a significant time sink every time new inventory arrives. This workflow eliminates most of that friction.
- Step 1: Establish your product data template. Before running this workflow for the first time, ask the agent to pull five existing products from your store that you consider well-structured — good descriptions, complete metafields, consistent tags. These become the template standard for all incoming supplier data.
- Step 2: Prepare the supplier data. When supplier data arrives as a PDF or spreadsheet, paste the content or share the file in your AI session. Prompt the agent: "Here is raw product data from my supplier. Using the product template standard we established, prepare Shopify product records for each item. Include: title, description written in our brand voice, product type, tags based on our taxonomy, and the following metafields: material, care instructions, country of origin, and certifications."
- Step 3: Review the generated records. The agent will produce a structured list of product records. Go through them and flag any items where the interpretation of the source data seems off — supplier specs are often inconsistent and the agent will flag ambiguities for you to resolve.
- Step 4: Push to the store. Once the records look correct, instruct the agent to create the products in your store via the GraphQL Admin API. New products appear in your catalog already structured — with SEO copy, metafields, and tags populated on day one.
- Step 5: Create a standing template for repeat suppliers. For suppliers you work with regularly, save a prompt template that encodes your preferences, tag taxonomy, and brand voice for their specific product categories. Each subsequent shipment runs through the same template automatically.
The math here is significant. One sustainable fashion brand reduced SKU onboarding time from 12 minutes to under 90 seconds per product using AI-powered metafield automation. If you're adding 200 new SKUs a season, that's the difference between 40 hours of admin work and under 5 hours.
Use Case 6: The Post-Purchase Flow Builder
Shopify Flow is one of the most powerful and most underused tools on the platform. Most merchants either don't use it at all or have one or two basic automations running. The learning curve is real, and building complex multi-step flows through the admin UI is genuinely tedious. The toolkit lets you describe what you want in plain English and have the agent build the flow configuration for you.
- Step 1: Write your flow in narrative form. Describe your ideal post-purchase sequence as if explaining it to a new team member: "After someone places their first order, wait 24 hours and tag them as a new customer. If they place a second order within 30 days, tag them as a repeat buyer and add them to our VIP segment. If they have not placed a second order within 30 days, add them to our win-back segment and trigger the re-engagement email sequence."
- Step 2: Share with the agent and request a Flow configuration. The agent uses its knowledge of Shopify's Flow schema to construct the triggers, conditions, and actions as a valid Flow configuration. Ask it to also document the logic in plain English so anyone on your team can understand the flow without opening the Flow editor.
- Step 3: Validate edge cases before deploying. Ask the agent to identify edge cases in the logic: what happens if a customer cancels their first order? What if an order comes in through a different sales channel? What if someone is already in the win-back segment and places a new order? Resolve any gaps before the flow goes live.
- Step 4: Deploy and monitor. Have the agent deploy the Flow configuration to your store. Set a reminder to review segment sizes and flow metrics after 30 days to confirm it's working as intended.
- Step 5: Iterate. Once the base flow is running, ask the agent to suggest two or three extensions — for example, adding a loyalty tag trigger that fires a different sequence for customers whose lifetime value exceeds a certain threshold. Build those as follow-up sessions.
Use Case 7: The Multi-Store Sync Agent
Merchants running multiple storefronts — an international site, a wholesale portal, a DTC store — spend a disproportionate amount of time keeping product data consistent across all of them. The toolkit's explicit multi-store support makes this a genuinely manageable workflow for the first time.
- Step 1: Authenticate against each store. Authenticate the toolkit against each of your stores separately using Shopify CLI. The store execute capability allows the agent to switch context between stores in a single session, which is the core feature that makes this workflow possible.
- Step 2: Define your sync rules in a reference document. Write a plain text sync rules file: which fields should be identical across all stores (product descriptions, metafields, tags), which fields should vary by store (prices in local currencies, inventory levels, shipping messaging), and which store is the source of truth for each data type.
- Step 3: Run weekly sync sessions. At the end of each week, open a session and instruct the agent: "Pull all product description, metafield, and tag changes made in the last 7 days on Store A. Replicate those changes to Store B and Store C. Do not overwrite prices, inventory levels, or any fields designated as store-specific in the sync rules document."
- Step 4: Generate a change log. After each sync, have the agent produce a structured change log: what was updated, which fields were changed, which stores received the update, and the timestamp. Keep this log as a running document so you have a full audit trail.
- Step 5: Run a post-sync validation. Ask the agent to spot-check 10 random products across stores after each sync to confirm the changes propagated correctly and no unintended overwrites occurred.
For agencies managing multiple client stores, this pattern is even more valuable. The toolkit was explicitly designed for multi-store use and the CLI context-switching is a core feature, not a workaround.
Use Case 8: The Catalog-Wide SEO Overhaul
This is larger than a quick SEO audit. This is a full strategic SEO rebuild of your product catalog — the kind of project that would normally take an SEO agency months and cost a significant budget. With the toolkit, a single merchant can run it as a series of structured prompt sessions.
- Step 1: Develop a brand voice and SEO brief. Before touching the catalog, create a reference document: your brand tone, vocabulary preferences, words to avoid, sentence length targets, primary keywords for each product category, and a target meta description format. This document gets attached to every prompt in this project to ensure consistency across thousands of updates.
- Step 2: Pull a full catalog inventory with current SEO data. Instruct the agent to export a summary of all products including their current meta title, meta description, and primary image alt text. This gives you a baseline and shows you the full scope of the gap before any changes are made.
- Step 3: Work collection by collection. For each collection, prompt the agent to rewrite product titles to include primary keywords naturally, rewrite meta descriptions to be under 160 characters with a clear value proposition, and generate contextual alt text for every primary product image. Work in batches of 30 to 50 products per session.
- Step 4: Run consistency checks after each collection. After completing each collection, ask the agent to review the updated pages and flag any where the tone deviates from the brand voice brief or keyword usage feels forced. Fix those in the same session before moving to the next collection.
- Step 5: Audit collection pages themselves. Once product pages are done, turn to collection pages. Pull a list of all collection pages and check which have empty or thin meta descriptions and page content. These are frequently blank on Shopify stores and represent a meaningful SEO opportunity. Have the agent write collection-level content that summarizes the category and includes relevant keywords.
- Step 6: Validate for Agentic Storefronts. With Agentic Storefronts now live for eligible US merchants, structured product data matters more than ever. Ask the agent to verify that your product pages have consistent, well-structured data that AI shopping agents from ChatGPT, Google AI Mode, and Microsoft Copilot can parse and recommend accurately. This is a new SEO surface that most merchants haven't considered yet. Check out Moast's guide to the best ecommerce tools for a broader look at the Shopify app stack worth building alongside this kind of SEO infrastructure work.
Use Case 9: The Product Launch Sequence Automator
Product launches involve more moving parts than they appear to from the outside. New collection setup, discount codes for different audience segments, visibility rules controlling who sees what and when, inventory allocation, and email trigger configuration. Something almost always gets missed when it's all managed manually. The toolkit can run the entire operational side of a launch from a single brief.
- Step 1: Write a complete launch brief. Document every element of the planned launch in plain English: product name, launch date and time, early access window for VIP customers (with their tag identifier), public access date, discount code details including percentage, eligible customer criteria, expiry date, and usage limits. Also include any collections involved, visibility rules, and any theme changes needed for the launch (banner, homepage section, featured product placement).
- Step 2: Have the agent generate a pre-launch checklist. Share the brief with the agent and ask it to generate a complete operational checklist of every Shopify action required to execute the plan, in the correct order, with dependencies noted. Review this checklist carefully before any execution starts. This step alone often surfaces things you'd otherwise forget.
- Step 3: Execute the checklist with the agent. Work through each item: create the discount code with the correct expiry, usage limit, and eligible customer criteria; build the new collection with its visibility schedule; assign the product to the correct collections; configure the homepage or featured section changes using the unpublished theme flag so they're ready to publish on launch day.
- Step 4: Run a pre-launch configuration audit. The day before launch, run a dedicated audit session: "Verify every element of tomorrow's launch configuration. Check that the discount code is set to activate at the correct time, the VIP collection has the correct visibility rules, the product is assigned to the correct collections, and there are no conflicts or missing settings." This is the checklist enforcement step that catches the things that fall through the cracks on manual launches.
- Step 5: Pull a post-launch performance snapshot. Within 48 hours of launch, instruct the agent to pull a first-look performance report: VIP discount code redemption rate, traffic to the new collection, add-to-cart rate on the new product, and early order volume. This data feeds directly into decisions about whether to extend the VIP window, adjust pricing, or accelerate marketing spend.
Done well, this workflow turns a launch that used to take a full day of team coordination into a two-hour focused session — and the AI acts as a checklist enforcer that catches what manual processes miss. For merchants who use shoppable video as part of their launch strategy, pairing this workflow with a platform like Moast for social commerce creates a complete launch stack that covers both backend operations and front-end video commerce.[IMAGE]
What to Know Before You Start
The toolkit is powerful enough that it deserves a clear-eyed look at its limitations. Knowing these before you dive in will save you a lot of pain.
There Is No Undo Button
This is the single most important thing to understand. As Shopifreaks' coverage notes, when you grant the toolkit mutation access and the agent executes a change, it goes live on your store immediately. No draft mode. No preview. No rollback. If you tell the agent to delete all products in a collection when you meant to remove products from the collection, those products are gone.
The rule is non-negotiable: always test on a development store first. Create a free dev store from your Shopify Partners dashboard, install the toolkit there, and run your workflows against test data before pointing them at production. Once you're confident in a workflow, document exactly what you prompted and what the agent executed so you can recreate or audit it later.
It's a Power Tool, Not a Self-Driving Car
The toolkit does not make decisions for your store. It executes the decisions you make, faster and at greater scale than you could manually. The strategic judgment — which products to feature, what tone to use, which customers to target — is still yours. Think of it as having a highly skilled, very fast executor on your team. The brief and the judgment come from you. The heavy lifting comes from the agent.
Setup Requires Technical Comfort
Shopify positions the toolkit as developer infrastructure, and the setup does require Node.js, CLI authentication, and some comfort with terminal commands. Non-technical merchants who want AI-powered store management today are better served starting with Shopify Sidekick — included free on every Shopify plan and accessible directly inside the admin. Once the toolkit is running, though, the prompting itself is plain English — no code required to operate it day-to-day.
Rate Limits Apply
Shopify's GraphQL API allows 1,000 cost points per minute on standard plans, with higher limits on Shopify Plus. Large catalog operations — updating thousands of products in a single session — can hit these limits. The agent handles rate limiting gracefully and will pause and resume automatically, but budget extra time for large-scale projects.
Keep Security Tight
Your Shopify access tokens should never be hardcoded, committed to version control, or shared outside your immediate team. Any delete operation is irreversible. Treat CLI authentication to your production store with the same care you'd treat admin password access. Keep a recent exported backup of your product catalog before running any bulk mutation workflow for the first time.
Why This Matters More Than It Looks
AI-attributed orders on Shopify increased 11x between January and November 2025. Agentic Storefronts launched on March 24, 2026 by default for all eligible US merchants, enabling AI shopping agents from ChatGPT, Microsoft Copilot, Google AI Mode, and Gemini to browse and complete purchases from Shopify stores directly. McKinsey projects $5 trillion in global agentic commerce volume by 2030.
The AI Toolkit sits right at the intersection of these trends. It is not a chatbot add-on or a content generation gimmick. It is the infrastructure layer that lets your store participate in an increasingly agentic commerce ecosystem — both as a more efficiently operated business and as a storefront that AI shopping agents can discover, parse, and recommend accurately.
Merchants who learn to work effectively with the toolkit now are building operational skills that compound in value as the ecosystem matures. The brands that pull ahead won't be the ones using AI to generate generic product descriptions. They'll be the ones using it to build, audit, optimize, and launch at a fundamentally different speed — running the equivalent of a small team's output through a single operator with an AI agent, a well-written brief, and a terminal window.
That is not a distant projection. For the merchants already running it, that's just Tuesday morning.
October 12, 2026
Related content
.jpg)
.jpg)
.jpg)
Turn your social content into a revenue channel
Turn your TikToks and Reels into shoppable videos and boost conversions by 3.5x.